
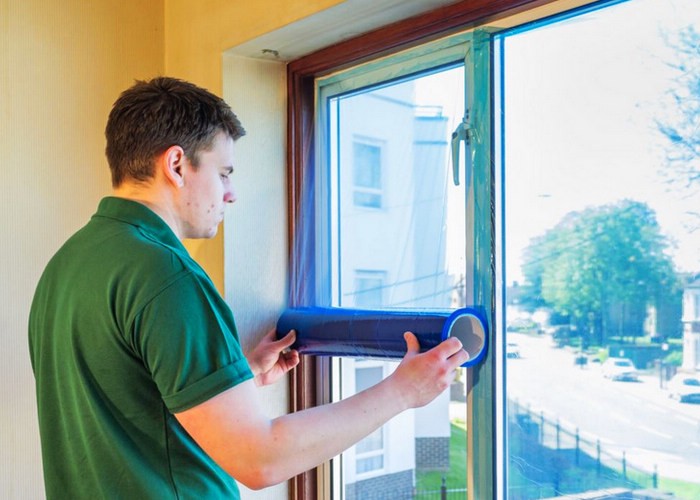
How to Install Window Protection Film for Maximum Efficiency
Have you ever wondered why your energy bills keep climbing during those scorching Australian summers? Are you frustrated by the harsh glare hitting your computer screen or worried about UV damage to your furniture? What if there were a simple, cost-effective solution that could tackle all these issues at once?
Window protection film is quickly becoming a must-have for Australian homes and businesses. This thin, adhesive layer applies directly to your glass surfaces, creating a barrier that blocks heat, UV rays, and even provides an extra layer of security. Whether you’re in sunny Brisbane or blustery Melbourne, the right film can make a noticeable difference to your comfort and your wallet.
In this guide, we’ll walk you through everything you need to know about installing window protection film yourself. From choosing the right type for your needs to mastering the application process, you’ll learn practical tips that ensure a professional-looking finish. We’ll also cover common mistakes to avoid, maintenance advice, and when it might be worth calling in the experts. Let’s get started on transforming your windows into energy-efficient powerhouses.
Types of Window Protection Film: Which One Do You Actually Need?
Before grabbing any old film off the shelf, it’s worth understanding what’s available. Solar control films are brilliant for reducing heat transfer, keeping your space cooler without cranking up the air conditioning. These are particularly popular across Australia’s warmer regions.
Security and safety films offer a different benefit altogether. They hold glass together upon impact, making them ideal for shopfronts, ground-floor windows, or homes with young children. Privacy films come in various opacities, from frosted to mirror-like finishes, perfect for bathrooms or street-facing windows.
UV protection films block up to 99% of harmful ultraviolet rays, protecting your skin and preventing your furniture, flooring, and artwork from fading. Decorative films add visual interest while still providing functional benefits. Think patterned designs for office partitions or stylish frosting for glass doors. Understanding your primary goal helps narrow down the perfect choice.
What Tools and Materials Do You Need to Install Window Film?
Gathering your equipment beforehand makes the entire process smoother. You’ll need a spray bottle filled with application solution (water mixed with a few drops of baby shampoo works brilliantly), a squeegee or application card, a sharp utility knife with fresh blades, a measuring tape, and lint-free cloths.
A heat gun can be helpful for tricky corners, though it’s not essential for beginners. Make sure you’ve got plenty of paper towels handy for catching drips. Some installers also use a hard card for final edge work and a spray bottle with plain water for initial cleaning.
Prepare your workspace by laying down towels or drop cloths beneath the windows. This catches any drips and protects your flooring. Clear the area of furniture and curtains that might get in the way. Good lighting is essential, so consider doing the installation during daylight hours when you can spot imperfections easily.
How to Measure Your Windows for Protection Film
Accurate measurements are crucial for a clean installation. Start by measuring the width of the glass pane at both the top and bottom—windows aren’t always perfectly square. Take the smaller measurement to ensure your film fits properly.
Next, measure the height on both the left and right sides, again using the smaller figure. Write everything down as you go. It’s surprisingly easy to mix up measurements when you’re working with multiple windows.
When ordering film, add an extra 25-50mm to each dimension. This gives you wiggle room for positioning and trimming. Most suppliers recommend purchasing 10-15% more film than your calculated total to account for mistakes or tricky windows. Better to have leftovers than run short mid-project.
Preparing Your Windows Before Installation
How do you clean windows before applying film? This step is non-negotiable for a successful installation. Start by removing any dust, dirt, or fingerprints using a mixture of water and a small amount of dish soap. Scrub thoroughly with a lint-free cloth or squeegee.
If you’re dealing with old film or adhesive residue, you’ll need a bit more elbow grease. A razor blade held at a shallow angle can scrape away stubborn remnants. Follow up with methylated spirits to dissolve any remaining adhesive, then wash again with soapy water.
Creating the right environment matters too. Aim for temperatures between 10-30°C—extreme heat or cold affects how the adhesive bonds. Avoid windy days if you’re working near open doors, as dust particles love landing on wet film. Turn off ceiling fans and close nearby windows to minimise airborne debris.
Step-by-Step Guide: How to Install Window Protection Film
Start by cutting your film roughly 25mm larger than your measured dimensions. Lay it flat on a clean surface with the liner facing up. Spray the window generously with your application solution—you want it properly wet, not just damp.
Peel the liner from your film while spraying the adhesive side with solution. This prevents it from sticking to itself and allows repositioning. With a helper if possible, lift the film and position it against the wet glass, leaving equal overlap on all sides.
Once roughly positioned, spray the outer surface of the film and use your squeegee to push out water and air bubbles. Work from the centre outward, using firm, overlapping strokes. Don’t rush this bit—it’s where the magic happens.
After squeegeeing, use your sharp utility knife to trim excess film. Hold the blade at a slight angle against the glass edge for the cleanest cut. Go slowly around corners. Finally, squeegee the edges again to ensure proper adhesion, wiping away any remaining solution.
Does Window Film Go on the Inside or Outside of Windows?
In most Australian applications, window film goes on the inside of your windows. Interior installation protects the film from weather damage, extends its lifespan, and makes future removal easier. It’s also safer to apply when you’re not balancing on ladders outside.
Exterior installation does have its place, however. Certain specialised films designed for outside application can provide superior heat rejection for specific glass types. They’re also useful when interior access is difficult or when the glass configuration doesn’t suit internal application.
For Australian climates, interior installation is the standard recommendation. Our harsh sun and occasional severe weather would quickly degrade externally applied film. Plus, you avoid the complications of cleaning around exterior film edges where dirt tends to accumulate.
How Long Does Window Film Take to Cure?
Patience is key during the curing process. Expect your newly installed film to take anywhere from 5-30 days to fully cure, depending on climate conditions and film type. Thicker security films generally take longer than thinner solar films.
During curing, you might notice small water bubbles or a slightly hazy appearance—this is completely normal. These imperfections disappear as moisture evaporates through the film. Resist the temptation to poke at bubbles or peel up corners to check progress.
Signs your film has fully adhered include crystal-clear appearance, no visible moisture pockets, and edges that feel firmly bonded when gently pressed. In cooler months or humid conditions, curing takes longer. Avoid cleaning newly installed film for at least 30 days to prevent disrupting the bonding process.
Common Installation Mistakes and How to Avoid Them
Why does my window film have bubbles? Usually, it’s down to insufficient solution during application or rushing the squeegeeing process. Always keep surfaces wet throughout installation and use overlapping squeegee strokes to push all air toward the edges.
Peeling edges typically result from inadequate cleaning beforehand or trimming too close to the glass edge. Leave a tiny gap (1-2mm) between the film edge and the window frame to prevent lifting. If edges do start peeling, a small amount of application solution can help reseal them.
Film contamination—those annoying specks trapped beneath the surface—happens when dust particles land on wet surfaces. Clean your workspace thoroughly, close windows, and consider wiping down nearby surfaces. Work quickly but methodically, and always keep a spray bottle handy to rewet surfaces that start drying prematurely.
How to Maximise Energy Efficiency with Window Protection Film
Choosing the right tint level significantly impacts performance. For north and west-facing windows that cop the most sun, opt for darker or more reflective films. East-facing windows benefit from moderate tints, while south-facing windows often need minimal treatment.
Consider your climate zone when selecting film specifications. Queensland homes might prioritise maximum heat rejection, while Victorian properties could benefit from films that retain warmth during winter while still blocking summer heat. Many modern films offer this dual functionality.
Combine your window film with other energy-saving measures for maximum impact. Complement it with well-fitted blinds or curtains, seal any drafts around window frames, and consider awnings for particularly exposed windows. Together, these improvements can dramatically reduce your heating and cooling costs year-round.
Is It Worth Installing Window Film Yourself or Hiring a Professional?
DIY installation saves money—often 40-60% compared to professional quotes. For straightforward rectangular windows at accessible heights, most handy homeowners can achieve excellent results with patience and preparation. The satisfaction of completing it yourself is a bonus.
However, professional installation makes sense for large commercial projects, unusually shaped windows, or premium films with strict warranty requirements. Professionals have specialised tools, experience with tricky situations, and can often guarantee their work. They’re also faster, completing in hours what might take you a weekend.
If your windows are above the ground floor, feature complex curves, or you’re simply short on time, calling in experts is worth considering. Get multiple quotes, check reviews, and confirm whether the installer provides warranty coverage for both the film and their workmanship.
Your Next Steps to Better-Protected Windows
Installing window protection film yourself is achievable with the right preparation and technique. We’ve covered the essentials—from selecting the appropriate film type to avoiding common pitfalls that trip up beginners. The key is taking your time, especially during surface preparation and the crucial squeegeeing stage.
Quality window film delivers genuine benefits for Australian homes and businesses. Lower energy bills, reduced glare, UV protection for your belongings, and enhanced privacy are all within reach. Whether you’re tackling a single bathroom window or your entire home, the investment pays dividends for years.
Ready to get started? Measure your windows this weekend, order your preferred film with that all-important extra margin, and set aside a day for installation. With the techniques you’ve learned here, you’re well-equipped to achieve a professional finish. Your cooler, more comfortable space awaits—and your next power bill might just surprise you.


