


If you are a professional handyman and you have a variety of projects to complete, you will find that you need a supply of hinge screws. These fasteners are an essential part of any project, and the wrong ones can lead to disaster.
They are made of stock-standard quality, and therefore can be quite costly to replace. If you are looking for the best hinge screws to use, consider buying alternative-style hinge screws. These screws will provide better holding power and a cleaner finish. Standard door hardware screws aren’t designed to handle the weight of a door and will weaken in time due to corrosion or timber softening.
Discover The Most Collective Defects And How To Prevent It While Using Screws For Construction
When you’re replacing hinges, be sure to use the right kind. If they’re too long, you’ll end up putting a lot of extra stress on the hinges. If you have a door that sticks, you should consider using a larger, longer screw.
When installing these screws, make sure to angle them towards the studs so that they don’t scratch the surface. If you have a small door, you can try using a longer screw instead. If your door is sticking, you’ll want to use bigger, longer screws.
The longer the self-tapping masonry screws, the more likely they are to be driven into the door’s frame. The longer screws should be angled towards the studs, while shorter ones should be pointed toward the door’s edge. Remember to line them up with studs for the best results.
You’ll save a lot of time by having everything lined up and ready to go before you begin. A top hinge screw is particularly vulnerable to pulling out, so it’s important to beef up this hinge’s screws. Generally, the top hinge screws carry the most weight, so you don’t want to risk them getting pulled out.
What’s So Good About Hinge Screw Building Supplies?
To beef up the screws, you should replace the standard 3/4-in. screws with 3-in. ones. These larger screws will go through the jambs and into the framing. When replacing the top hinge, it’s also wise to add a three-inch-long screw. If your door is stuck, you should replace the hinge screws. It’s a relatively simple process.
- First, you should remove the door and the hinge screw.
- Next, you’ll need to tighten the screws with the replacement ones.
- Some of these screws may be tighter than others, so you should take your time to ensure that you have a screwdriver that can tighten them properly.
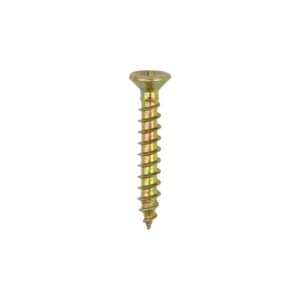
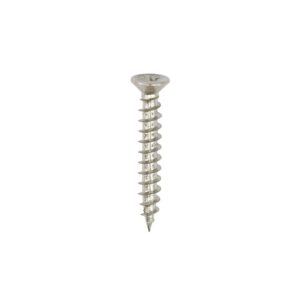
They can also be corrode-resistant and can be used for outdoor woodwork. You can also buy screws that are specially designed for outdoor use. If your door is exposed to moisture, you should consider purchasing a stainless-steel hinge screw that is resistant to this element.
Its stainless-steel hinge screw will prevent the door from rusting. Its slash-tip will reduce the chance of splitting. When you buy this type of hinge, you should also take care of the length and shape of the door.
Checking For Quality – Would You Like to Save Your Dollars?
Garden doors typically use “tee” or “band-and-gudgeon” hinges. These hinges have a long strap across the face of the gate. They’re made of carbon steel, which is great for outdoor woodwork. The band should be at least 33.3mm wide. Stainless steel screws are also more resistant to corrosion. You’ll want to consider the type of nut that’s best for your project.
If you’re using structural timber screws, you need to ensure that it is the right one. You can use a screwdriver to drill the new screw. You should drill a hole in the center of the door to avoid it from warping. Moreover, you should choose a drill bit that is sharply angled. The angle of the new hinge screws should hit the wood and drywall. So, it is important to choose the correct type of nut.
Choosing the right nut is essential for a strong and secure hinge. The right type of screw will also help your door to close properly. Once you’ve found the perfect hinge screw, you can drill the holes to ensure that you get the best one. You can also use a drill to tighten the existing screw. If you’re not confident with drilling, you can always use a hammer. When a door is firmly fixed, it will remain intact for a long time.
How To Use Self Tapping Masonry Screws In Concrete?: Fixtures Can Make All The Transformation
One of the best ways to fasten masonry is by using composite deck screws. These screws are self-drilling, meaning that when you screw them into a softer substrate, such as concrete, the self-tapping bit at the tip will cut a thread. If you use a self-tapping screw in concrete, you should make sure to drill a pilot hole first to make sure that the screw doesn’t damage the surface.
These self-tapping masonry screws require a pilot hole that is a little smaller than the diameter of the screw. The hole is usually 6mm in diameter, which makes them ideal for fixing thin metal. These screws also work super-fast and don’t need to be threaded. To use them, you must drill a pilot hole or a smaller diameter screw hole. In general, you need to drill a pilot for larger size screws.
When using self-tapping masonry screws, you’ll need to drill a small pilot hole slightly smaller than the diameter of the screw. Once this is done, you’ll have a very fast way to fasten thin metal. However, you should make sure that you’re working with a thick piece of wood before using self-tapping masonry screws. The material will need a hole of about 6mm.
self tapping masonry screws have an excellent hold on concrete. This type of screw is also very flexible. You can drill it anywhere you want, as long as you’re aware of the proper placement of the screw. The most common use for self-tapping masonry screws is to install screws into masonry. A self-tapping concrete screw is the perfect example of a practical application of this technology.
What Everybody Needs To Know About Screws Before Project?
Before you use self-tapping masonry screws, make sure to prepare the base material first. In order to install the screws, you must drill a hole slightly deeper than the screw’s diameter.
This will allow for room for dust to fall. The depth of the hole should be slightly larger than the size of the hole.
In addition, you need to ensure that the surface of the brick is clean and free of debris.
Self-tapping masonry screws are a great choice for concrete. While they’re easy to install, they’re not the only ones that work well. If you’re building a concrete wall, you’ll need to choose a concrete screw with a slightly smaller diameter.
A 3/16-inch carbide drill bit is recommended for drilling a hole for a 1/4-inch masonry screw. The length of the screw should be the same as the diameter of the pilot hole.
Final Words!
When you’re installing self-tapping masonry screws, it’s important to note that they cannot drill through metal, which means you’ll need to drill a pilot hole before you install the screws. These screws, however, require no pilot holes.
They tap the material while being installed and remain fastened. You can find different types of self-tapping masonry screws with various points that are shaped to fit the specific material in question.


